.png?width=175&height=62&name=PMW-by-Rentvine-Logo%20(1).png)
Start Accepting Messages
You have now set up your chat and are ready to start accepting messages. When a customer starts a chat, the first message they receive is an automatic message set up in the LiveChat Agent app. This way, when you get a chat, you have a bit of time to get ready.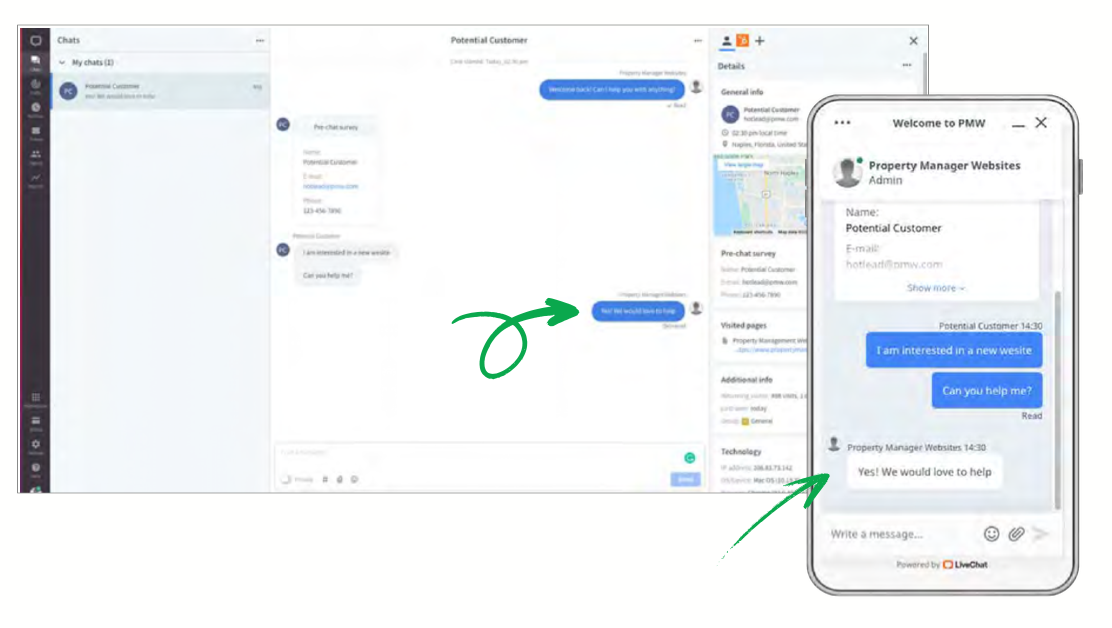
When the customer starts to type their message, you’ll see what they are writing in real-time. When you write a response, the customer can see that you are composing a message, but they can’t see what you’re writing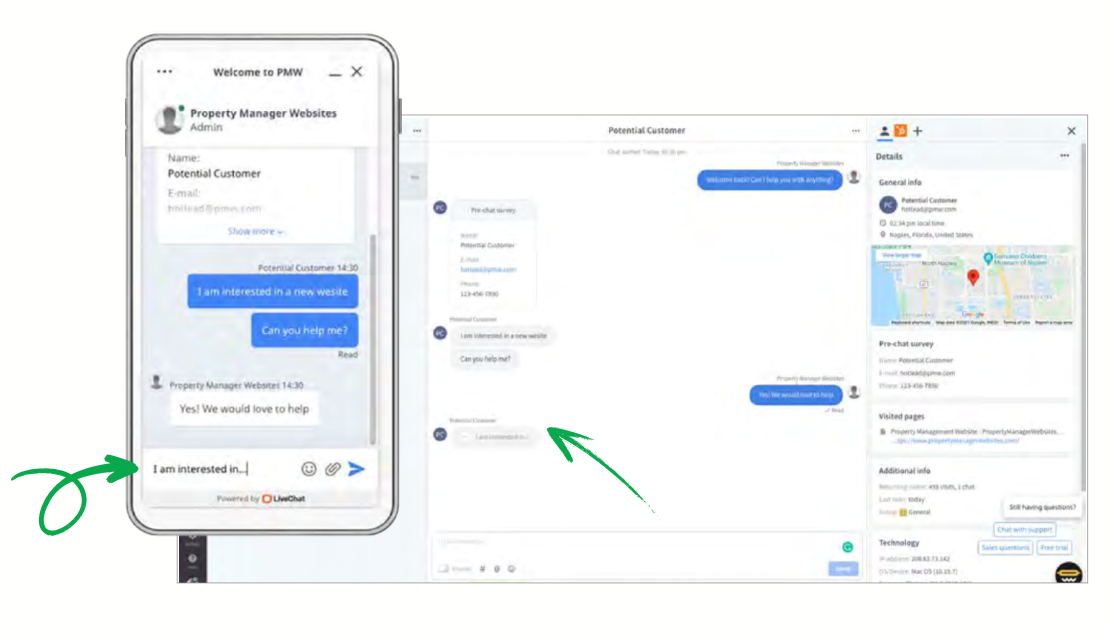
Understanding Your LiveChat Screen
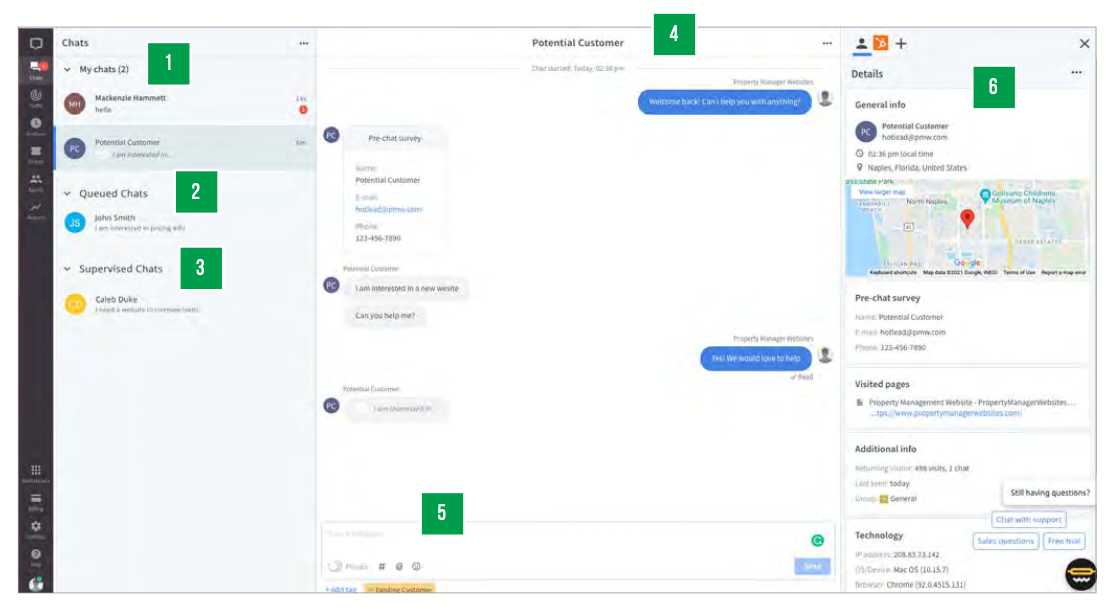
1. My Chats
A list of all customers who are chatting with you. Switch between chats by clicking on names on the list.
2. Queued Chats
A list of all customers who are waiting in the queue. If you have some free time on your hands, pick a customer from the list to start a conversation.
3. Supervised Chat
A list of customers who are chatting with your teammates. You can supervise those chats and see how other agents communicate with visitors.
4. Chat History
Previously sent messages, both from you and your customer. Additionally, you will
be able to see what the visitor is currently typing in through the message sneak-peek.
5. Message Area
Type in your message here and send it to the customer. Your visitor will be notified that you have started replying, providing some additional reassurance that the case is being handled.
6. Visitor Details
Here you will find all the information provided by your customers. You can check their email address, location, the page they are currently on, and much more!
To learn more about canned responses, to edit, add group responses, and more, check out this help article: https://www.livechat.com/help/canned-responses.
How Does Chat End?
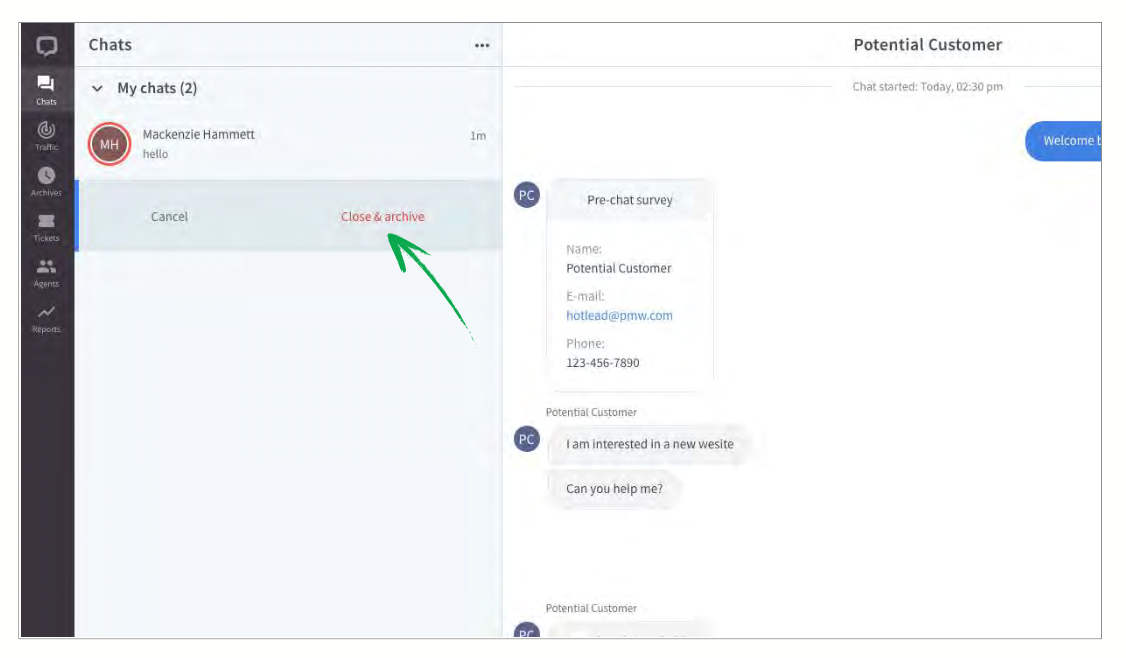
A Chat Ends:
- When the customer closes the chat widget on your website.
- When they leave your website.
- The chat will close automatically when there are no new messages sent in a given time. Ask your team leader how this is set for your team. Learn more about inactivity timeouts.
-
You can close the chat at your end. Find it on the list and click the X in the top right corner. If the chat hasn’t been closed by the customer or an inactivity timeout, you’ll be asked to confirm closing the chat. Click “Close and archive” to close the chat and remove it from your list.
To learn more about canned responses, to edit, add group responses, and more, check out this help article: https://www.livechat.com/help/canned-responses.
Offline Chats
‘TICKETS’ ARE MESSAGES SENT VIA THE CHAT WIDGET WHEN YOUR TEAM IS OFFLINE. YOU CAN FIND THEM IN THE LEFT NAVIGATION UNDER TICKETS.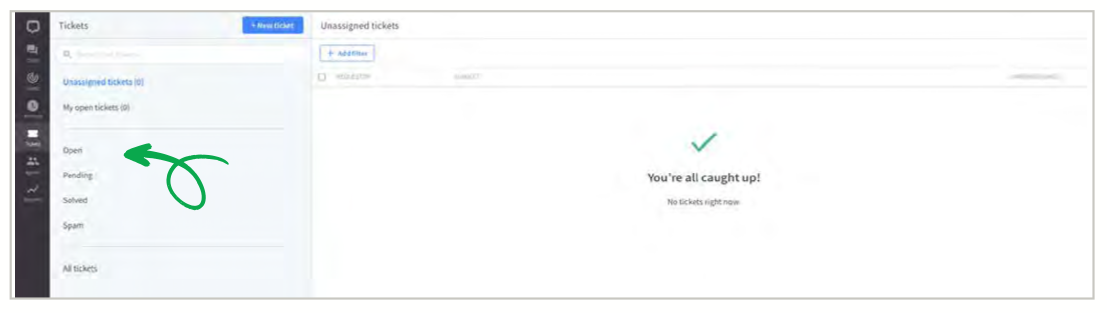
Tickets can be filtered down to 4 categories
1. Open | Every time you receive or create a ticket, it will have the Open status. This means that the case is ongoing and needs attention.
2. Pending | When you send a message to the customer, e.g., ask the customer for some additional information, the status of the ticket will change to Pending. As soon as you get an answer, it will switch back to Open. If the customer does not respond in three days, LiveChat will send an automatic reminder. If the customer still does not respond, the ticket status will be automatically changed to Solved after additional 4 days.
3. Solved | When a case is finished, you can close the ticket by changing its status to Solved. The customer will be notified about it and asked to rate their experience.
4. Spam | If the ticket you received contains malicious and unwanted content, you can mark it as Spam. Use this status carefully, all emails from an address marked as spam will automatically be assigned this status in the future.
Save Time With Canned Responses
Probably the biggest asset and time saver for your team will be the canned responses. They allow you to recall pre-made answers by typing in hash (#) and the shortcut for the desired response.
Find yourself typing the same responses time and again? Quickly save answers to common questions, and save yourself the boredom of retyping the same content over and over. Use the saved time to engage the customer, lifting both your moods at the same time!
To learn more about canned responses, to edit, add group responses,
and more, check out this help article: https:// www.livechat.com/help/ canned-responses.
Adding Canned Response
Each LiveChat account comes with a set of sample responses. You can use them out of the box, tweak them or add your own. There are two ways to add a new response:
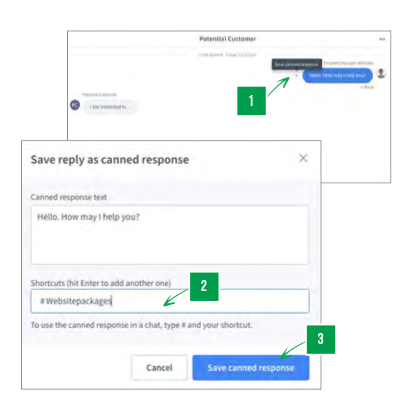
DIRECTLY FROM THE CHAT:
If you find yourself sending the same reply yet another time, you can save it with just one click.
1. After replying to the customer’s question, hover your mouse over your message and click the Save as canned response icon.
2. You will see a popup window in which you can edit a message and add a shortcut. To add more than one shortcut, separate each by a comma.
3. Finally, to keep changes, hit Saved canned response.
FROM SETTINGS:
Here you can create new canned responses from scratch, edit existing ones, and delete the ones you no longer use. Follow the steps below to add a new one:
1. To begin, go to Settings > Agent tools > canned responses.
2. Then, enter the canned response text.
3. And choose a shortcut.
4. Click Add this response button to save it.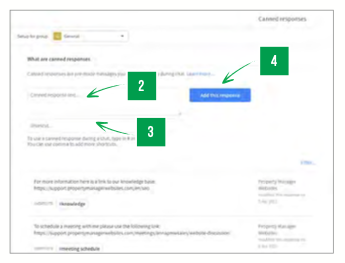
When sending a predefined response, personalize it with the customer’s name. Also, try tweaking the template a little bit each time so that you don’t sound robotic.
To learn more about canned responses, to edit, add group responses, and more, check out this help article: https://www.livechat.com/help/canned-responses.
Interested in Online Chat?
Interested in talking with an expert or ready to sign up for Chat? Click here!
Additional Resources
Check out these additional resources or contact support@propertymanagerwebsites.com for more information!